Roof Rack Guide

Choosing the best roof rack for your truck or SUV means understanding the differences between platform racks, crossbars, and basket racks. Whether you need a roof rack for a Tacoma, 4Runner, Jeep Wrangler, or Subaru, this 2026 buying guide compares top brands like Prinsu, Thule, Sherpa, and Front Runner to help you find the perfect roof rack for your vehicle, budget, and cargo needs.
📋 Quick Navigation
- → Types of Roof Racks
- → How to Choose Your Roof Rack
- → Understanding Weight Capacity
- → Best Roof Rack Brands
- → Best Racks by Vehicle
- → Installation & Mounting
- → Roof Rack Accessories
- → Complete Decision Guide 2026
- → DIY Installation Step-by-Step
- → Prinsu vs Sherpa Comparison
- → Frequently Asked Questions
We've tested roof racks on everything from Tacomas to Subarus over the past decade. The answer isn't simple—it depends on your vehicle, your cargo needs, and what trade-offs you're willing to make. This guide breaks down exactly what separates platform racks from crossbars and basket racks so you can choose the right one for your adventures.
Quick Comparison: Roof Rack Types at a Glance
| Feature | Platform Racks | Crossbars |
|---|---|---|
| Price Range | $400-$2,000 | $150-$500 |
| Weight Capacity | 500-1,000+ lbs static | 150-300 lbs dynamic |
| Installation Time | 30-60 minutes | 15-30 minutes |
| Roof Top Tents | Ideal | Some models only |
| Fuel Economy Impact | 2-5% reduction | 1-3% reduction |
| Best For | Overlanders, heavy gear | Weekend warriors, bikes |
Types of Roof Racks: Platform, Crossbars, and Basket
Roof racks fall into three main categories. Understanding the differences helps you choose the right system for your vehicle and intended use.
Platform Roof Racks
Prinsu platform rack - modular aluminum design with 1,000 lb capacity
A platform roof rack covers most or all of your vehicle's roof with a flat, slotted surface. These are the heavy-duty workhorses of the roof rack world. Platform racks bolt directly to your vehicle's factory mounting points or roof rails, creating a stable foundation for heavy loads.
Platform racks come in three sizes:
Full Platform Racks: Cover the entire roof from front to back. These offer maximum cargo space and the strongest weight ratings. Most accommodate roof top tents, allow light bar mounting at the front, and provide the most tie-down points. Some include removable sections for sunroof access.
3/4 Platform Racks: Cover roughly three-quarters of the roof, typically leaving the rear section open for sunroof use. These are lighter than full platforms and still long enough for most roof top tents and kayaks. They're popular on SUVs where maintaining sunroof functionality matters.
Half Platform Racks: Cover only the front or rear half of the roof. These work well on Jeep Wranglers and Gladiators where you want to preserve freedom panel functionality. Half racks typically can't support roof top tents but handle lighter cargo fine.
Pro Tip: If you plan to mount a roof top tent, always choose a platform rack over crossbars. The distributed load support and higher weight ratings make platform racks significantly safer and more stable for sleeping on your roof.
✓ Platform Rack Advantages
- Highest weight capacity (most support 500-1,000+ lbs static)
- Most mounting points for accessories (lights, awnings, shovels, MaxTrax)
- Best for roof top tents and heavy gear
- Strongest and most secure mounting to vehicle
- Modular design allows customization
✗ Platform Rack Disadvantages
- More expensive ($400-$1,500+)
- Heavier than crossbars (impacts fuel economy)
- Taller profile (may not fit in some garages)
- Vehicle-specific fitment (not universal)
Best for: Overlanders, roof top tent users, serious off-roaders, anyone regularly hauling heavy or bulky gear.
Crossbars (Also Called Roof Bars)

Thule crossbars - aerodynamic design perfect for bikes and cargo boxes
Crossbars are two (sometimes three or four) horizontal bars that run from side to side across your roof. They're the most common and affordable roof rack option. Crossbars attach to your vehicle via feet that clamp to factory roof rails, gutters, or door frames.
Modern crossbars use aerodynamic profiles (square, oval, or wing-shaped) to reduce wind noise and drag. They work with a huge ecosystem of accessories—bike racks, cargo boxes, kayak carriers, ski racks—that clamp or slide onto the bars.
✓ Crossbar Advantages
- Most affordable option ($150-$500 for quality sets)
- Lightweight (minimal impact on fuel economy)
- Low profile (fits in most garages)
- Quick to install and remove
- Often universal or transferable between vehicles
- Huge selection of compatible accessories
- Easy to reach and load
✗ Crossbar Disadvantages
- Lower weight capacity (typically 150-300 lbs)
- Not ideal for roof top tents (some work, but platform racks are better)
- Fewer mounting points for off-road accessories
- Less stable under heavy loads
Best for: Weekend adventurers, cyclists, paddlers, skiers, families needing occasional extra cargo space, smaller vehicles.
Basket Roof Racks
Basket racks feature raised sides (usually 4-8 inches tall) creating a cargo "basket" on your roof. True basket racks are standalone units that mount directly to your roof. However, many platform racks can add removable side rails to function as baskets.
Baskets excel at containing loose cargo—camping gear, bags, firewood—that might slide off a flat platform. The raised sides provide extra tie-down points and keep items secure.
✓ Basket Rack Advantages
- Excellent for bulky, loose cargo
- Extra tie-down points on raised rails
- Some are removable from crossbars (versatile)
- Good for expedition-style travel
✗ Basket Rack Disadvantages
- Tallest profile (garage clearance issues)
- More wind resistance (worse fuel economy)
- Difficult to mount kayaks, boards, or ladders
- Usually can't accommodate roof top tents without modifications
- More expensive than simple crossbars
Best for: Expedition travelers, those hauling lots of loose gear, people who want maximum cargo containment.
How to Choose the Right Roof Rack
Picking the right roof rack means matching the rack type to your vehicle, your cargo needs, and your budget. Here's how to narrow down your options.
Consider Your Vehicle Type
Trucks: You have options. If you're running a bed rack and mainly need cab coverage for kayaks or to support a roof top tent overhang, crossbars work fine. If you want to carry heavy cargo on the cab (water tanks, gear boxes, recovery equipment), get a platform rack. Just remember: trucks are front-heavy with a roof rack and cargo. The weight over the cab affects braking and handling more than on an SUV.
SUVs: SUVs are ideal for platform racks. Most have strong roofs, factory mounting points, and sufficient payload capacity. A full platform rack on a 4Runner, Wrangler, or Land Cruiser creates a versatile cargo platform for anything from roof top tents to expedition gear. If you only need weekend cargo space for bikes or boards, crossbars are more economical.
Cars and Crossovers: Smaller vehicles typically need crossbars. A sedan or compact crossover doesn't have the roof strength, payload capacity, or tire/suspension setup to safely handle a heavy platform rack with 400+ lbs of gear. Stick with lightweight crossbars and appropriate cargo (bikes, cargo boxes, small kayaks). Check your vehicle's manual for maximum roof load ratings.
Important: Always check your vehicle's owner's manual for maximum roof load capacity. This is different from the rack's capacity. The lower number is your true limit for safe operation.
Match Rack to Your Cargo Needs
Get a platform rack if you:
- Plan to mount a roof top tent
- Regularly haul heavy gear (water tanks, fuel, recovery equipment)
- Want to mount LED light bars, awnings, MaxTrax, or other overlanding accessories
- Need maximum cargo space and tie-down points
- Do serious off-roading and need a bombproof rack
Get crossbars if you:
- Mainly carry bikes, skis, kayaks, or paddleboards
- Need a cargo box for road trips
- Want affordable extra cargo space
- Prefer easy installation and removal
- Have a smaller vehicle with limited roof capacity
Understanding Roof Rack Weight Capacity
Understanding weight ratings keeps your cargo safe and legal
Weight capacity is critical for safety and legal operation. There are two ratings you must understand: dynamic and static.
Dynamic Weight Capacity
Dynamic weight capacity (DWC) is the maximum weight your roof rack can safely carry while the vehicle is moving. This accounts for road vibrations, braking forces, cornering, and impacts. Most crossbars have a DWC of 150-300 lbs. Platform racks typically range from 300-800 lbs dynamic. Your vehicle's roof also has a manufacturer-specified maximum load—check your owner's manual. The lower number is your actual limit.
Static Weight Capacity
Static weight capacity (SWC) is the maximum weight the rack can hold when the vehicle is parked and stationary. This matters for roof top tent users because you're sleeping in the tent on the rack. Most platform racks have SWC ratings of 600-1,200+ lbs. A roof top tent that weighs 150 lbs might need 800+ lbs SWC to safely hold the tent plus two adults sleeping in it. Static capacity is usually 2-4x higher than dynamic capacity.
⚠️ Important: Never exceed your vehicle's maximum roof load rating found in the owner's manual. This is separate from the rack's capacity. The lower number is your true limit. Learn more about vehicle roof load safety standards from NHTSA.
Best Roof Rack Brands for 2026
Not all roof rack brands are equal. Here are the manufacturers we trust and recommend based on quality, customer feedback, and real-world durability.
Prinsu Design Studio

Prinsu Tacoma rack - American-made quality at competitive pricing
Prinsu revolutionized the American roof rack market with their lightweight, modular, made-in-USA platform racks. Based in Idaho, Prinsu builds some of the best platform racks available at surprisingly competitive prices. Visit Prinsu's official website to explore their complete lineup and technical specifications.
What sets Prinsu apart: fully modular design with removable slats. You can configure the rack to your exact needs—remove slats to access your sunroof, add slats for more tie-down points. Most Prinsu racks install with zero drilling, bolting directly to factory roof mounting points. Installation takes under an hour for most DIYers.
Prinsu racks feature 1000+ lb static weight ratings, making them ideal for roof top tents. The low 2-inch profile minimizes wind resistance and maintains garage clearance. They offer extensive accessory options: light bar mounts, MaxTrax holders, awning brackets, and more.
Best for: Overlanders wanting American-made quality without premium pricing. Excellent value.
Price Range: $600-$1,200
Sherpa Equipment Company

Sherpa Gladiator rack - thickest side rails in the industry
Sherpa builds premium platform racks in Colorado using thicker, denser aluminum alloys than most competitors. Their racks are noticeably more robust—thicker side rails, beefier construction, better hardware.
Sherpa's signature feature: protective rubber feet where the rack mounts to your vehicle. This prevents roof scratches and provides better vibration dampening. Their racks are modular like Prinsu but with slightly heavier-duty construction.
Weight ratings vary by vehicle but typically range 500-800 lbs static. Sherpa offers both full-length and 3/4-length platforms. Their low-profile designs maintain excellent aerodynamics despite robust construction.
Best for: Those who want premium construction and plan to load their rack heavily.
Price Range: $800-$1,400
Front Runner Outfitters

Front Runner Slimline II - expedition-proven durability
South African manufacturer Front Runner makes the toughest roof racks in the world. Their Slimline II series has proven itself on brutal African expeditions and Outback crossings. If durability is your top priority, Front Runner delivers.
Front Runner racks use heavy-duty steel or aluminum construction depending on model. They sit slightly taller than low-profile competitors but offer unmatched strength. The company offers a limited lifetime warranty because they know these racks last.
Front Runner pioneered many overlanding rack accessories: wolf packs (storage boxes), water tank mounts, table systems, and more. Their ecosystem is unmatched for expedition-style travel.
Best for: Serious overlanders, expedition travelers, anyone who needs absolute durability.
Price Range: $900-$1,600
Gobi Racks

Gobi Stealth - hand-welded American craftsmanship
Gobi makes fully welded, American-manufactured steel racks. Each rack is custom-built to order, welded by hand, and powder-coated for maximum durability. These are investment-grade racks built to outlast your vehicle.
Gobi racks feature 800+ lb static weight ratings and incredibly secure mounting systems. The fully welded design eliminates rattles and creates a unified structure that distributes loads evenly.
Because racks are made to order, lead times can be 6-12 weeks—but customers say they're worth the wait.
Best for: Those who want heirloom-quality gear and maximum load capacity.
Price Range: $1,200-$2,000+
Thule

Thule WingBar - industry-leading aerodynamics
Swedish company Thule is the world's largest roof rack manufacturer and essentially created the modern crossbar market. Their crossbars are engineered for maximum aerodynamics, minimal noise, and universal compatibility.
Thule's strength is their massive accessory ecosystem. Bike racks, cargo boxes, kayak carriers, ski racks—if it mounts to a crossbar, Thule makes it. Their racks work on virtually any vehicle from compact cars to full-size SUVs.
Thule crossbars use aerodynamic profiles (WingBar, SquareBar) that reduce wind noise and drag compared to round bars. Installation takes under 30 minutes with basic tools.
Best for: Anyone needing crossbars for bikes, cargo, or recreation.
Price Range: $250-$600
Rhino Rack

Rhino Rack Pioneer - modular platform that mounts on crossbars
Australian brand Rhino Rack competes directly with Thule in the crossbar market while also offering innovative platform racks. Their Pioneer Platform system is unique—it mounts on top of crossbars, giving you platform rack functionality without permanent installation.
Rhino Rack's strength is versatility. You can run just crossbars, add a Pioneer Platform when needed, or go full platform rack. Their Backbone system (for Jeeps) mounts directly to the vehicle's internal frame for maximum strength.
Best for: Those who want flexibility to switch between configurations.
Price Range: $250-$1,200
UpTop Overland

UpTop Bravo - thicker side rails handle trail abuse
UpTop Overland makes American platform racks with innovative features at competitive prices. Their Bravo series features "grooveArmor" side rails—thicker than most competitors—that handle off-road abuse better.
UpTop's wind deflector design splits airflow both up and down rather than just deflecting up. This reduces noise and improves aerodynamics noticeably. Their steel mounting feet are overbuilt for extra security.
Best for: Budget-conscious buyers who want American quality without premium pricing.
Price Range: $500-$1,500
Best Roof Racks by Vehicle
The best roof rack depends heavily on your specific vehicle. Here are our top recommendations for popular overlanding and adventure vehicles.
Best Roof Racks for Toyota Tacoma
Top Pick: Prinsu Tacoma Cab Rack
The Prinsu cab rack is our best-selling roof rack for good reason. Made in USA, it installs in under an hour with no drilling, offers 1,000 lb static capacity, and costs less than premium competitors while matching their quality.
At only 2 inches tall and 38.5 lbs, this rack barely impacts fuel economy or garage clearance. The modular design lets you remove slats to access the sunroof. It mounts directly to factory roof points.
Premium Alternative: UpTop Overland Bravo Tacoma Rack
If you want thicker side rails and extra beef, the UpTop Bravo delivers. The grooveArmor sides handle trail abuse better, and the superior wind deflector reduces noise.
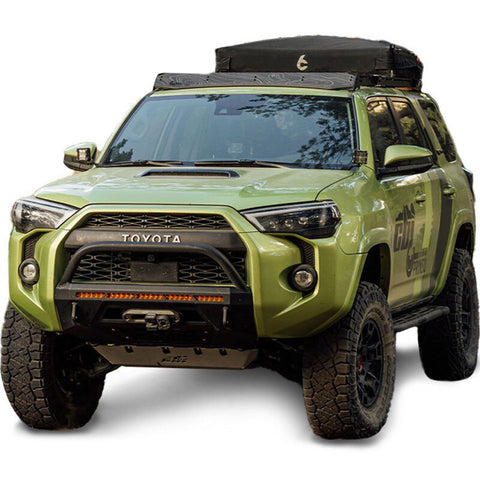
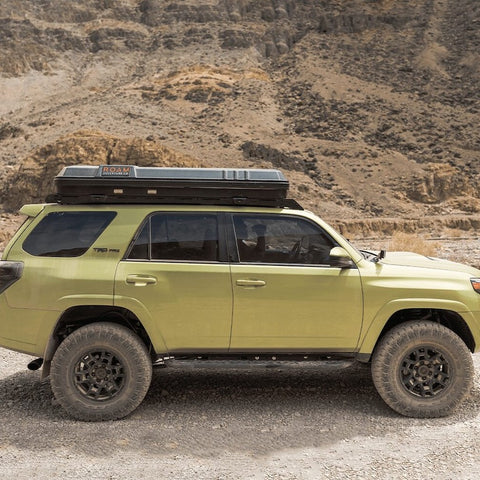
Best Roof Racks for Toyota 4Runner
Top Pick: Prinsu 4Runner 5th Gen Full Rack
This is Off Road Tents' #1 selling roof rack overall. The Prinsu 4Runner rack offers everything the Tacoma version does—1,000+ lb capacity, modular design, no drilling—but sized perfectly for the 4Runner's roof.
The full-length rack maximizes cargo space while staying incredibly low-profile. Remove front slats to open the sunroof. Installation takes 45-60 minutes.
Premium Alternative: Front Runner Slimline II 4Runner Rack
For maximum durability and the best accessory ecosystem, Front Runner's Slimline II is unmatched. The 660 lb rating is conservative—these racks handle serious abuse.
View Front Runner 4Runner Rack →
Best Roof Racks for Jeep Gladiator
Top Pick: Gobi Stealth Gladiator Rack
The Gobi Stealth offers 800 lb capacity, fully welded American construction, and the most secure mounting system available for Gladiators. It's compatible with the moon roof and provides a mesh floor for maximum tie-down versatility.
Budget Alternative: Sherpa Sunlight Gladiator Rack
The Sherpa Sunlight costs less ($700-$900) while delivering premium construction. The 300 lb rating works for most cargo and roof top tents. It mounts to the Gladiator's gutters with zero drilling.
Best Roof Racks for Jeep Wrangler
Wranglers present unique challenges with removable tops and freedom panels. Most Wrangler owners choose half or 3/4 racks to maintain top functionality.
Top Pick: Rhino Rack Backbone System
The Backbone mounts directly to the Wrangler's internal frame rails, creating the strongest possible connection. It bypasses the roof entirely, so you can remove panels and top freely. This is the gold standard for serious Wrangler roof racks.
Best Roof Racks for Subaru Outback/Forester
Subarus have strong factory roof rails but limited overall roof capacity. Stick with crossbars unless you have a specific need for a platform.
Top Pick: Thule WingBar Evo
The WingBar Evo offers the best aerodynamics in the crossbar market. It's whisper-quiet, installs in 20 minutes, and works with Thule's entire accessory line. Perfect for bikes, cargo boxes, or kayaks on weekend adventures.
Installation and Mounting Options
Most modern roof racks install without drilling. Here's what to expect for different mounting types.
Factory Mounting Point Installation
This is the easiest and strongest installation. Vehicles with factory mounting points (Tacoma, 4Runner, Tundra, many Jeeps) have threaded inserts or bolt holes built into the roof, usually covered by plastic caps.
Remove the caps, position the rack's feet over the mounting points, and bolt down. Most racks include all necessary hardware. The entire process takes 30-60 minutes and requires only basic hand tools.
This method creates the strongest possible connection because you're bolting directly into reinforced sections of the roof structure.
Roof Rail Installation
If your vehicle has factory roof rails, crossbar installation is simple. The rack's feet clamp or bolt onto the rails using vehicle-specific adapters.
Slide the feet onto the rails, position the crossbars where you want them, and tighten the clamps. Total time: 15-30 minutes. Most systems are tool-free or require only a simple hex key.
Gutter Mount Installation
Older vehicles and some off-road vehicles have rain gutters. Gutter-mount racks use clamps that grab under the gutter lip.
Position the rack, slide the clamps under the gutter, and tighten. Make sure the clamps have rubber padding to prevent paint damage. This method is strong but slightly less secure than direct mounting.
⚠️ Important: Never exceed your vehicle's maximum roof load rating found in the owner's manual. This is separate from the rack's capacity. The lower number is your true limit. Learn more about vehicle roof load safety standards from NHTSA.
Roof Rack Accessories and Add-Ons
Roof racks become more useful with the right accessories. Here are the most popular and practical add-ons.
Roof Top Tents
Platform racks are ideal for mounting roof top tents. Make sure your rack's weight capacity exceeds the tent's weight plus occupants. Most platform racks easily handle 150-200 lb tents.
Hardshell and softshell tents mount similarly—they bolt through the rack's slats using the tent's mounting hardware. Installation takes 30-60 minutes.
Bike Racks for Roof Racks

Kuat Piston SR - premium roof-mounted bike carrier
Roof-mounted bike racks work on both crossbars and platform racks. The Kuat Piston SR is our top recommendation—it's all-metal construction, tool-free mounting, works on both roof racks and hitch receivers with an adapter, and includes an integrated cable lock.
Cargo Boxes and Storage

Thule Force XT XXL - 22 cubic feet of weatherproof storage
Cargo boxes provide weatherproof, lockable storage for camping gear, sports equipment, or luggage. They mount quickly to crossbars—most systems take under 5 minutes.
The Thule Force XT XXL offers 22 cubic feet of storage and 165 lb capacity. It's our most popular cargo box. For budget-conscious buyers, the Rhino Rack MasterFit provides similar capacity at a lower price.
Awning Mounts
Most platform racks accommodate awnings via side-mount brackets. Awnings provide instant shade at camp and significantly improve outdoor comfort.
Make sure your rack has compatible mounting points or brackets available. Prinsu, Sherpa, and Front Runner all offer awning brackets designed for their racks.
How to Choose a Roof Rack in 2026: Complete Decision Guide
Choosing the right roof rack comes down to matching your vehicle, cargo needs, and budget. Here's the step-by-step process we recommend after helping thousands of customers find their perfect rack.
Step 1: Identify Your Vehicle's Roof Type
Your vehicle determines which racks will fit. Check if you have:
- Factory roof rails: Raised bars running front to back (most SUVs and crossovers)
- Bare roof: Smooth metal roof with hidden mounting points (most trucks and some cars)
- Gutter mounts: Rain gutters along roof edges (older vehicles and Jeep Wranglers)
- Fixed mounting points: Factory attachment points without visible rails (modern sedans)
Consult your owner's manual or check with the rack manufacturer's fit guide. Most quality manufacturers offer online fit checkers where you enter your year, make, and model to see compatible racks.
Step 2: Determine Your Primary Use Case
What will you carry most often? This dictates which type of rack works best:
Choose platform racks if: You're mounting a roof top tent, carrying heavy overlanding gear (200+ lbs regularly), want maximum tie-down flexibility, or need a rack that doubles as a work platform for recovery or repairs.
Choose crossbars if: You're carrying bikes, kayaks, skis, or cargo boxes. You want lower cost and minimal fuel economy impact. You need easy removal when not in use. Your cargo rarely exceeds 150 lbs total.
Choose basket racks if: You carry irregular loads (camping gear, firewood, construction materials). You want contained cargo that won't slide off. You don't mind the added height and wind resistance.
Step 3: Calculate Required Weight Capacity
Add up the weight of everything you'll carry simultaneously, including the rack itself. Remember:
- Roof top tents: 100-180 lbs (tent) + 300-600 lbs (occupants) = need 500+ lb static capacity
- Bike setup: 2 bikes (60 lbs) + rack mounts (15 lbs) = need 100+ lb dynamic capacity
- Cargo box: Box weight (30-50 lbs) + contents (50-100 lbs) = need 150+ lb dynamic capacity
- Mixed overlanding gear: Recovery boards (30 lbs) + fuel cans (50 lbs) + water (60 lbs) + awning (50 lbs) = need 200+ lb dynamic capacity
Check both your vehicle's maximum roof load (in owner's manual) and the rack's capacity. The lower number is your true limit. Never exceed either rating.
Step 4: Set Your Budget Range
Quality roof racks range from $300 to $1,500 depending on type and brand. Here's what to expect:
Budget tier ($300-$500): Basic crossbars from Thule or Rhino Rack. Adequate for light use but fewer features. Some imported platform racks fall here but quality varies significantly.
Mid-range ($500-$900): Premium crossbars with better aerodynamics, American-made platform racks like Prinsu and UpTop Overland, Australian Rhino Rack platforms. Best value for most overlanders—quality construction without luxury pricing.
Premium ($900-$1,500+): Sherpa Equipment, Gobi, Front Runner platform racks. Expedition-grade construction, extensive accessory ecosystems, often heavier-duty materials. Worth it if you're serious about overlanding or need maximum durability.
Factor in accessories too. A $600 rack might need another $200-400 in mounting accessories, lights, or cargo management gear to be fully functional for your needs.
Step 5: Consider Long-Term Versatility
The best roof rack grows with your needs. Ask yourself:
- Will I add a roof top tent in the future? (If yes, get platform rack now even if you don't have the tent yet)
- Do I plan to keep this vehicle 5+ years? (If yes, invest in quality—the rack will outlast the truck)
- Will I transfer this rack to my next vehicle? (Check if the brand offers different vehicle adapters)
- Do I need modular accessory mounting? (Platform racks with T-slot tracks offer maximum flexibility)
Many overlanders regret buying crossbars first, then upgrading to a platform rack later. If there's any chance you'll want a platform rack eventually, buy it now and save the double purchase.
Roof Rack Installation Guide: DIY Step-by-Step
Most roof racks install in 30-90 minutes with basic hand tools. Here's what the process looks like for the most common installation types.
Installing Platform Racks on Factory Mounting Points
Modern trucks (Tacoma, Gladiator, F150) have factory roof mounting points designed for racks. This is the easiest installation:
Tools needed: Socket wrench set, torque wrench, measuring tape, marker or painter's tape, step ladder.
Step 1 - Locate mounting points: Open your sunroof or remove interior dome lights to access the underside. Factory mounting points are threaded inserts in the roof. On Tacomas, there are typically 8-12 points. Clean any dirt or debris from the mounting areas.
Step 2 - Position the rack: With a helper, lift the rack onto the roof. Most platform racks weigh 80-120 lbs, so two people make this safer. Center the rack front-to-back and side-to-side. Use measuring tape from roof edges to ensure equal spacing.
Step 3 - Mark and verify alignment: Before installing any bolts, mark where each mounting foot sits. Double-check that mounting feet align with factory points. Remove the rack and verify all mounting points are accessible and clean.
Step 4 - Install mounting hardware: Place rubber seals or gaskets (included with most racks) over each mounting point. These prevent water intrusion. Lift the rack back into position. Thread bolts through the rack feet into factory mounting points. Hand-tighten all bolts first before final torquing.
Step 5 - Torque to specification: Using a torque wrench, tighten all bolts to the manufacturer's specification (typically 15-25 ft-lbs for aluminum racks). Work in a star pattern—tighten opposite corners sequentially to ensure even pressure. Never over-torque, as this can strip threads or crack mounting feet.
Step 6 - Final inspection: Check that the rack sits level. Rock it gently to verify it's secure. Inspect all mounting points from inside the vehicle to confirm no water intrusion. Re-check torque after 50-100 miles of driving.
Installing Crossbars on Roof Rails
If your vehicle has factory roof rails, crossbar installation is straightforward:
Most crossbar systems use adjustable towers that clamp onto roof rails. Measure the distance between your roof rails to ensure the crossbars you're buying are long enough. Position towers at manufacturer-specified spacing (typically marked on the rails or in your owner's manual).
Slide the crossbar towers onto the rails. Most systems have knobs or levers that tighten against the rail. Tighten until secure but not over-tightened—you should be able to remove them without tools if needed. Use a measuring tape to verify the crossbars are parallel and perpendicular to the vehicle. Adjust as needed.
Lock the towers (if your system includes locks) and test the installation by applying firm upward pressure. The crossbars shouldn't shift or move. Load the rack within the first few days and re-check tightness after your first trip.
Common Installation Mistakes to Avoid
Over-tightening bolts: This is the number one mistake. More torque doesn't mean more security—it means stripped threads and cracked components. Use a torque wrench and follow specifications exactly.
Skipping sealant or gaskets: Every rack-to-roof interface needs proper sealing. Water leaks cause rust, electrical issues, and interior water damage. Use the provided gaskets and add a thin bead of silicone sealant if recommended by the manufacturer.
Uneven weight distribution: When loading your rack, distribute weight evenly. Loading all weight to one side stresses mounting points unevenly and can cause rack failure or roof damage.
Not re-checking after break-in period: Hardware settles during the first few hundred miles. Always re-torque bolts and check alignment after your first trip with the new rack installed.
💡 Pro Tip: Take photos during installation showing bolt placement and measurements. If you ever need to remove and reinstall the rack (or transfer it to another vehicle), these photos make reinstallation much faster and more accurate.
Prinsu vs Sherpa Roof Rack: Which Brand Is Better?
These two brands dominate the American-made platform rack market. Both build exceptional racks, but they target slightly different users. Here's the detailed comparison.
Construction and Materials
Prinsu
Marine-grade aluminum construction (6061-T6). Fully welded frame with modular slat design. The rack ships as one piece—no assembly required. Weight varies by vehicle but typically 80-110 lbs for full-size truck racks. Low 2-inch profile minimizes wind resistance and maintains garage clearance.
Sherpa Equipment
Also uses 6061-T6 aluminum but with thicker cross-members and a more robust perimeter frame. Sherpa racks are noticeably heavier (100-130 lbs) due to beefier construction. Profile is slightly taller at 2.5-3 inches but provides more vertical tie-down options.
Winner: Tie. Prinsu prioritizes lighter weight and lower profile. Sherpa prioritizes maximum strength. Choose based on whether you value weight savings (Prinsu) or absolute maximum durability (Sherpa).
Weight Capacity and Performance
Prinsu: 1,000 lb static capacity on most models, 250-300 lb dynamic capacity. This handles any roof top tent on the market plus occupants. The lower profile reduces center of gravity, improving handling when loaded.
Sherpa: 1,000+ lb static capacity with some models rated to 1,200 lbs. Dynamic capacity typically 300-350 lbs. The additional weight capacity comes from thicker materials and reinforced mounting points.
Winner: Sherpa (slightly). The higher capacity provides more safety margin for heavy loads, though both racks handle typical overlanding gear without issue.
Modularity and Accessories
Prinsu: Removable slat system is genius—you can configure the rack exactly how you want. Remove slats for sunroof access, add slats for more tie-down points. Extensive accessory ecosystem including light mounts, MaxTrax holders, awning brackets, Hi-Lift jack mounts, and more. T-slot extrusion on perimeter accepts standard hardware.
Sherpa: Fixed platform design with integrated T-slot tracks running the length of the rack. Less reconfigurable than Prinsu but extremely clean appearance. Sherpa's accessory lineup is smaller but high-quality, focusing on essential items like light bars, awning mounts, and recovery gear brackets.
Winner: Prinsu. The removable slat system offers unmatched versatility. If you want a rack that adapts to changing needs, Prinsu wins decisively.
Installation Complexity
Prinsu: Bolt-on installation using factory mounting points. No drilling required on most vehicles. Clear instructions included. Average install time 45-60 minutes with basic tools. Some users report fitment being tight—rack holes might not perfectly align with factory points, requiring minor adjustment.
Sherpa: Also bolt-on using factory points. Installation is similar to Prinsu. Sherpa users report slightly better fitment tolerances—holes align more consistently with factory mounting points. Install time typically 45-75 minutes.
Winner: Sherpa (slightly). Tighter manufacturing tolerances mean fewer fitment headaches during installation.
Price and Value
Prinsu: $600-$900 depending on vehicle. This is exceptional value for American-made, fully welded aluminum construction with 1,000 lb capacity. Accessories range from $50-$200 each.
Sherpa: $900-$1,200 for most models. The premium reflects heavier-duty construction, tighter tolerances, and Colorado small-batch manufacturing. Accessories typically $75-$250 each.
Winner: Prinsu. Unless you specifically need Sherpa's extra capacity or prefer their aesthetic, Prinsu delivers 90% of the performance for 70% of the cost.
Who Should Choose Prinsu?
- Budget-conscious overlanders who still want American-made quality
- Users who value configurability and want to customize their rack layout
- Anyone prioritizing lower weight and better fuel economy
- Overlanders who like the extensive accessory ecosystem
- Users who want low-profile design for garage clearance
Who Should Choose Sherpa?
- Serious overlanders who want maximum durability and don't mind extra weight
- Users who prefer clean, fixed platforms over modular designs
- Anyone who values tight manufacturing tolerances and easier installation
- Overlanders willing to pay premium for Colorado small-batch craftsmanship
- Users planning extremely heavy loads (multiple roof top tents, expedition gear)
Bottom line: You can't go wrong with either rack. Prinsu offers better value and versatility. Sherpa offers maximum strength and precision. Both will outlast your vehicle.
Ready to choose your platform rack?
Frequently Asked Questions About Roof Racks
Can any roof rack fit my car?
No. Most roof racks are vehicle-specific or require vehicle-specific mounting kits. Before buying, confirm the rack is designed for your vehicle's year, make, and model. Crossbars are more universal but still need the correct mounting feet for your roof type.
How much does a roof rack affect fuel economy?
Empty crossbars reduce fuel economy by 1-3% due to aerodynamic drag. Platform racks typically cause 2-5% reduction. Loaded racks have bigger impacts—a cargo box can reduce MPG by 5-15% depending on size and speed. Low-profile racks minimize this impact.
Can I leave my roof rack on year-round?
Yes, if installed correctly. Most roof racks are designed for permanent installation. Crossbars can be removed in 5-10 minutes if you want to maximize fuel economy when not in use. Platform racks are typically left on permanently.
Will a roof rack fit in my garage?
Measure your garage clearance and add the rack's height to your vehicle's height. Most crossbars add 2-4 inches. Platform racks add 2-6 inches depending on design. Low-profile racks from Prinsu (2 inches) maintain garage clearance better than taller options.
Do I need a roof rack for a roof top tent?
Yes. Roof top tents mount to roof racks, not directly to vehicle roofs. You need a rack with sufficient weight capacity—most roof top tents require 500+ lb static capacity. Platform racks are ideal. Some heavy-duty crossbars work but platform racks are safer and more stable.
How do I prevent my roof rack from whistling or making noise?
Aerodynamic crossbars (Thule WingBar, Rhino Vortex) minimize wind noise through their shape. For existing racks, aftermarket wind fairings attach to the front crossbar and deflect air over the rack. Make sure all mounting hardware is tight—loose racks rattle.
Can I install a roof rack myself?
Yes. Most roof racks are designed for DIY installation. If you can use basic hand tools (wrenches, sockets), you can install a roof rack. Instructions are included and most systems take 30-90 minutes. The only exception: drilling into bare roofs, which some people prefer to have professionals do.
What's the difference between roof rack static and dynamic weight capacity?
Dynamic capacity is the maximum weight the rack can carry while driving. Static capacity is the maximum weight when parked. Static is always higher (2-4x dynamic) because parked loads don't experience road forces. This matters for roof top tents—you need adequate static capacity for the tent plus people sleeping in it.
Are roof racks universal or vehicle-specific?
Platform racks are almost always vehicle-specific—one rack fits one vehicle (or sometimes a family of closely related vehicles). Crossbars are more universal but still require vehicle-specific mounting feet. A universal rack doesn't exist, but some crossbar systems work across many vehicles by swapping feet.
How do I clean and maintain my roof rack?
Wash your rack when you wash your vehicle using car soap and water. Check mounting bolts periodically to ensure they're tight—vibration can loosen hardware over time. Aluminum racks don't rust but can oxidize; clean with aluminum cleaner if they get dull. Steel racks benefit from periodic inspection for rust, especially in salty environments.
Can I mount a roof rack on a car with a sunroof?
Yes. Most modern vehicles with sunroofs also have roof rack mounting points positioned around the sunroof. Many platform racks offer removable slats or sections that allow sunroof access. Check the specific rack's design before buying if sunroof access is important to you.
What is the best roof rack for the money?
For platform racks, Prinsu offers the best value—American-made quality with 1,000 lb capacity at $600-$900. For crossbars, Thule WingBar provides excellent aerodynamics and compatibility at $350-$500. UpTop Overland Bravo racks ($500-$900) deliver premium construction at mid-range pricing.
Is it worth getting a roof rack?
Yes, if you regularly need extra cargo space or plan to mount a roof top tent, bikes, kayaks, or cargo boxes. Roof racks pay for themselves by enabling adventures you couldn't take otherwise—weekend camping trips, bike excursions, ski trips. They also increase your vehicle's resale value.
What is the difference between roof rails and roof racks?
Roof rails are the raised bars that run front to back on many SUVs and crossovers—they come factory-installed. Roof racks (crossbars or platform racks) mount onto those roof rails to create usable cargo space. Think of roof rails as the foundation and roof racks as the structure you build on top.
Final Thoughts: Choosing Your Roof Rack
The best roof rack matches your vehicle, your cargo needs, and your budget. Platform racks excel for overlanding, roof top tents, and heavy gear—they're worth the investment if you use your vehicle for serious adventures. Crossbars are perfect for weekend warriors, cyclists, paddlers, and anyone who needs flexible cargo options without permanent investment.
Brand matters. Stick with proven manufacturers like Prinsu, Sherpa, Front Runner, Thule, and Rhino Rack. These companies stand behind their products with real warranties and excellent customer support. Cheap imported racks might save money upfront but often fail under real use.
Start with your vehicle's roof type and weight capacity. Make sure any rack you buy is specifically designed for your vehicle and doesn't exceed your roof's load rating. Factor in not just the rack but the cargo you'll carry.
Ready to Upgrade Your Cargo Capacity?
Browse our complete collection of roof racks from top manufacturers
Questions about roof racks or fitment?
Call us at 844-200-3979 or email info@offroadtents.com