Roof Top Tent Mounting: Complete Installation Guide
Proper roof top tent mounting can make the difference between a safe adventure and a dangerous situation on the road. With rooftop tents weighing between 125-270 pounds and creating additional wind resistance, your mounting system becomes the critical link between comfort and catastrophe.
Whether you’re planning to install your first tent or upgrade your current setup, understanding the mounting options available will help you make an informed decision that matches your vehicle, budget, and camping style. From budget-friendly cross bars to heavy-duty bed racks, each mounting system offers unique advantages depending on your specific needs.
This comprehensive guide covers everything you need to know about roof top tent mounting, from selecting the right system to completing a safe installation that will last for years of adventures.
Essential Mounting Systems Overview
Understanding your roof top tent mounting options is the first step toward a successful rooftop tent installation. Three primary mounting systems dominate the market, each designed for different vehicle types and camping needs.
Cross bars represent the most cost-effective solution for most passenger cars and SUVs. These horizontal bars attach to your vehicle’s existing roof rails or factory mounting points, providing a stable platform for tent attachment. Cross bar systems typically cost between $200-600 and work well for occasional campers who prioritize budget over maximum load capacity.
Roof rack platforms offer heavy-duty mounting for serious overlanders and frequent campers. These complete rack systems provide additional mounting points for awnings, storage boxes, and other adventure gear. Full roof racks range from $800-2000 but deliver superior load distribution and versatility for extended expeditions.
Bed racks mounted on truck beds provide an alternative to roof mounting, offering better weight distribution and easier tent access. Available in three height configurations, bed racks eliminate concerns about vehicle height while maintaining excellent load capacity for larger tents.
|
Mounting System |
Best For |
Weight Capacity |
Cost Range |
Installation Complexity |
|---|---|---|---|---|
|
Cross Bars |
Cars, SUVs |
75-220 lbs |
$200-600 |
Low |
|
Roof Racks |
All vehicles |
150-1200 lbs |
$800-2000 |
Medium-High |
|
Bed Racks |
Trucks only |
200-1500 lbs |
$600-1500 |
Medium |
Weight capacity requirements vary significantly between dynamic (driving) and static (parked) conditions. Most roof rack systems support 300-500 lbs while driving but can handle 500-1000 lbs when stationary. Understanding these limits prevents structural damage and ensures safe travel to your camping destination.
Cost comparison reveals that cross bars provide the best value for weekend warriors, while serious overlanders benefit from investing in full rack systems. Bed racks offer truck owners a unique middle ground with excellent capacity and reasonable pricing.
Weight Capacity and Safety Requirements
Weight calculations form the foundation of safe rooftop tent mounting. Your mounting system must support not just the tent itself, but also bedding, personal gear, and potential additional equipment like awnings or storage boxes.
Dynamic weight capacity refers to the maximum load your roof rack can support while driving. Most aftermarket cross bar systems handle 75-150 lbs in motion, while premium roof racks often support 150-220 lbs. This capacity includes the tent base weight plus any gear stored inside during travel.
Static weight capacity applies when your vehicle is parked and often doubles the dynamic rating. A rack rated for 100 lbs while driving might safely support 200 lbs when stationary, accommodating sleeping occupants inside the tent.
Typical roof top tent weights break down as follows:
-
Small 2-person tents: 125-145 lbs
-
Medium 3-person tents: 145-165 lbs
-
Large 4+ person tents: 165-250 lbs
-
Hard shell tents: 130-270 lbs
Calculate your total weight by adding the tent base weight, bedding (15-25 lbs), personal gear stored in the tent (10-30 lbs), and any additional accessories. This total must remain within your mounting system’s dynamic weight capacity for safe highway travel.
Vehicle manufacturer specifications provide the ultimate authority on roof load limits. Check your owner’s manual or contact your dealer to confirm maximum roof loads, as these vary significantly between models. Some compact cars limit roof loads to just 100 lbs, while larger SUVs may support 200+ lbs.
Safety margins of 10-20% below maximum ratings provide additional security against unexpected loads or mounting system wear. If your rack supports 150 lbs dynamically, plan for a maximum 120-135 lb tent and gear combination.
Understanding these weight requirements helps you select compatible equipment and avoid dangerous overloading that could damage your vehicle or create road hazards.
Cross Bar Mounting Systems
Cross bar mounting offers the most accessible entry point for roof top tent installation. This cost-effective solution works with most passenger vehicles equipped with roof rails, factory mounting points, or rain gutters.
Compatible rail types determine which cross bar system fits your vehicle. Raised side rails allow direct attachment of cross bar feet, while flush rails require specific adapters. Older vehicles with rain gutters accommodate specialized gutter-mount cross bars. Vehicles with factory mounting points (threaded holes or clips) accept the most secure installations.
Popular cross bar brands include Thule, Yakima, and Rhino Rack, each offering systems for different vehicle configurations. Thule WingBar Edge provides excellent aerodynamics for fuel efficiency, while Yakima Round Bar offers maximum load capacity. Rhino Rack Heavy Duty bars deliver the best value for money with 165 lb capacity.
Load distribution requirements mandate proper cross bar spacing for tent stability. Small tents typically require two cross bars spaced 24-36 inches apart, while larger tents need three bars with even spacing across the tent’s length. Position mounting hardware as close to the roof rack attachment points as possible to minimize stress concentration.
Cross Bar Installation Steps
Begin installation by measuring your tent’s rail spacing and marking cross bar positions accordingly. Most tents require crossbars positioned 6-12 inches from each end rail, with additional bars spaced evenly for longer tents.
Tools needed include a measuring tape, socket wrench set, torque wrench, and safety glasses. Some installations require drilling, necessitating a drill, appropriate bits, and thread-locking compound.
Install cross bars according to manufacturer instructions, ensuring proper torque specifications are met. Most systems require 15-25 ft-lbs for final tightening, though specifications vary by brand and mounting type.
Position your tent on the installed cross bars, centering it both longitudinally and laterally on your vehicle. The tent should align with your vehicle’s centerline for optimal aerodynamics and handling.
Secure the tent using provided mounting hardware, typically consisting of bolts, washers, and nuts that thread through tent rails into cross bar attachment points. Tighten hardware gradually in a cross pattern to ensure even load distribution.
Common installation mistakes include inadequate spacing between mounting points, using incorrect torque specifications, and failing to verify clearance for tent deployment. Double-check all measurements before final tightening to avoid repositioning mounted hardware.
Test your installation by attempting to deploy and retract the tent several times, verifying smooth operation and adequate clearance. Check mounting hardware tightness after the first 50-100 miles of driving, as initial settling may require retightening.
Roof Rack Platform Systems
Roof rack platform systems provide the ultimate mounting solution for dedicated overlanders and frequent campers. These comprehensive systems transform your vehicle’s roof into a versatile platform capable of supporting tents, gear, and accessories simultaneously.
Heavy-duty construction typically involves aluminum extrusion or steel framework designed for extreme loads and harsh conditions. Full platforms distribute tent weight across multiple mounting points, reducing stress on individual attachments and providing superior stability.
Compatibility with additional accessories sets platform systems apart from basic cross bars. Integrated T-slots or mounting channels accept awnings, cargo boxes, spare tire carriers, and lighting systems. This modularity makes platform racks ideal for extended expeditions requiring substantial gear capacity.
Recommended brands include Front Runner for maximum modularity, Prinsu for excellent build quality, Gobi for traditional steel construction, and Rhino Rack for value-oriented aluminum systems. Each manufacturer offers vehicle-specific mounting solutions ensuring proper fit and load distribution.
Permanent vs removable rack options affect long-term vehicle use and fuel economy. Permanent installations provide maximum security and load capacity but impact daily driving efficiency. Quick-release systems enable rack removal for improved fuel economy when not camping.
Installation complexity varies significantly between rack types. Simple bolt-on systems require basic tools and 2-4 hours installation time. Complex permanent installations may require professional installation, especially when drilling mounting holes or modifying vehicle structure.
Professional vs DIY installation depends on your mechanical skills and tool availability. Professional installation ensures proper fit and often includes warranties covering both parts and labor. DIY installation saves money but requires careful attention to torque specifications and mounting point locations.
Platform systems typically support 300-600 lbs dynamic capacity, significantly exceeding cross bar limitations. This additional capacity accommodates larger tents plus substantial gear loads without exceeding safety margins.

Truck Bed Rack Mounting
Truck bed racks offer unique advantages for pickup owners, providing alternative mounting that eliminates roof height concerns while delivering excellent load capacity and tent access.
Three height options accommodate different tent sizes and vehicle use requirements. Cab-height racks position tents level with the truck cab, maximizing cargo bed access while supporting large 4-person tents. Mid-height racks provide compromise between aerodynamics and capacity, ideal for 2-3 person tents. Low bed racks minimize wind resistance and maintain parking garage compatibility while supporting smaller tent configurations.
Compatibility with different truck bed lengths affects rack selection significantly. Short beds (under 6 feet) require compact racks that maximize mounting efficiency within limited space. Long beds (6+ feet) accommodate larger racks with additional accessory mounting points.
Impact on fuel efficiency varies by rack height and design. Low-profile racks create minimal aerodynamic disruption, while cab-height systems significantly increase wind resistance. Removable designs allow rack removal for daily driving, optimizing fuel economy when not camping.
Leading bed rack manufacturers include Leitner Designs for premium aluminum construction, upTop Overland for modular flexibility, and Yakima for mainstream accessibility. Each brand offers different mounting methods and load capacities suited to various truck configurations.
Weight distribution advantages over roof mounting include lower center of gravity, improved vehicle stability, and reduced stress on roof structure. Bed racks typically support 700-1500 lbs static capacity, significantly exceeding most roof systems.
Bed Rack Height Selection
Cab-height racks position tents 60-72 inches above ground, providing excellent camping comfort and cargo accessibility. These systems work best with larger families or extended camping trips requiring substantial gear storage. Height disadvantages include parking limitations and increased wind resistance.
Mid-height racks offer 48-60 inch tent positioning, balancing accessibility with aerodynamics. This configuration suits most 2-3 person tents while maintaining reasonable fuel economy for highway travel. Mid-height systems provide good compromise for mixed urban and adventure use.
Low racks maintain 24-36 inch tent height, prioritizing fuel efficiency and parking compatibility. These systems work well for occasional campers who need parking garage access and minimal daily driving impact. Load capacity may be limited compared to taller configurations.
Clearance considerations for garage storage become critical with taller rack systems. Measure your garage door height and add tent deployment clearance to determine maximum acceptable rack height. Many modern garages accommodate vehicles up to 84-96 inches total height.
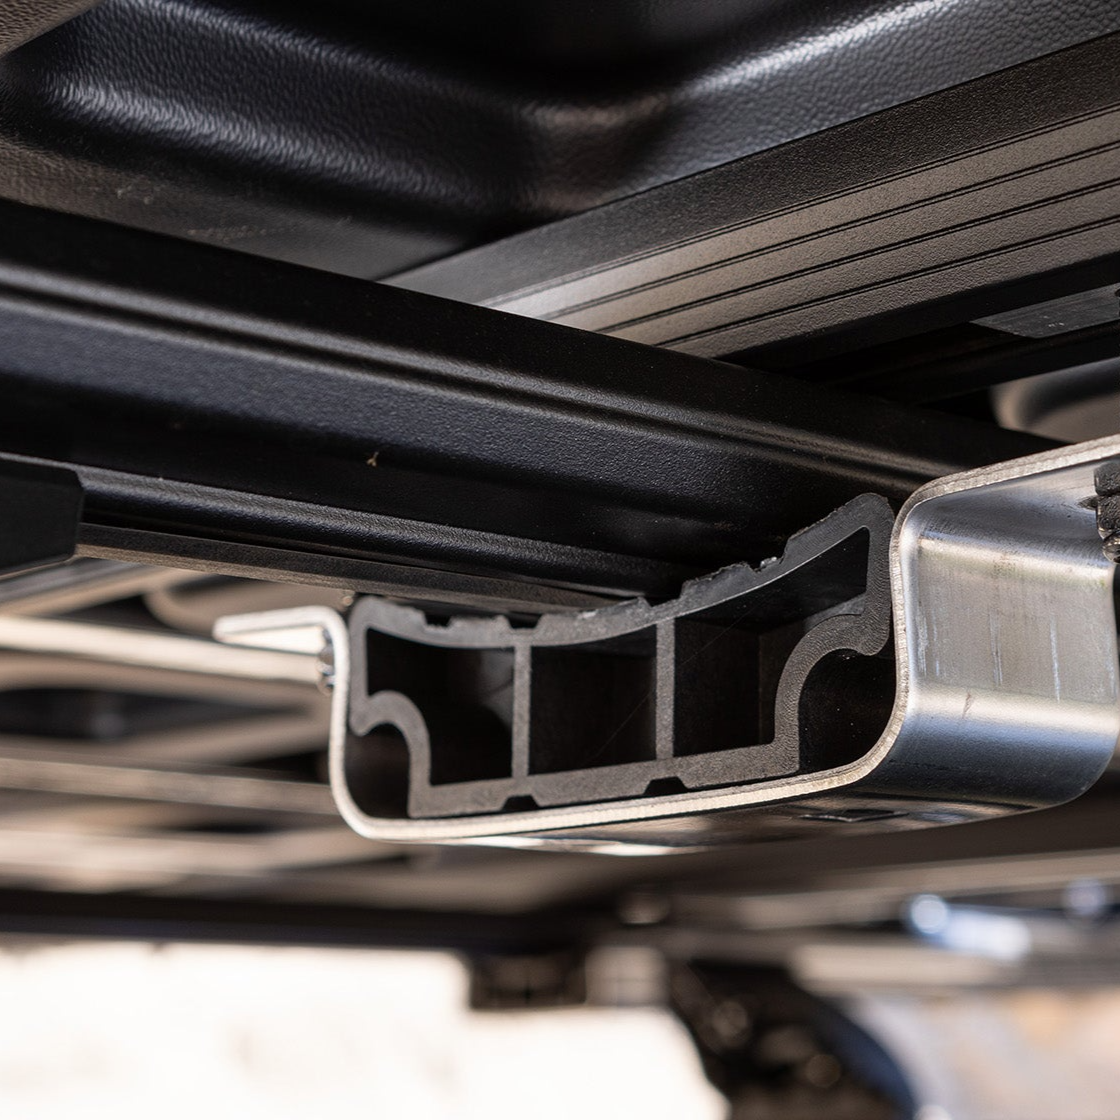
Mounting Hardware and Installation Process
Understanding mounting kit components ensures successful tent installation regardless of your chosen rack system. Complete mounting kits typically include specialized hardware designed for your specific tent and rack combination.
Tent rail compatibility requires matching mounting hardware to your tent’s rail geometry. Some tents use T-slot rails accepting standard bolts, while others require proprietary hardware. Verify compatibility before purchase to avoid installation delays or additional hardware costs.
Complete mounting kits generally include mounting bolts, washers, nuts, anti-seize compound, and installation instructions. Premium kits may include quick-release mechanisms, locking hardware, or vibration-dampening materials.
Step-by-step installation begins with unpacking all components and verifying completeness against included instructions. Layout hardware in order of use and read instructions completely before beginning work.
Position your tent on the rack system, ensuring proper alignment and clearance for deployment. Mark mounting hole locations using provided templates or direct measurement from tent rails.
Install mounting hardware finger-tight initially, allowing position adjustment before final tightening. Use thread-locking compound on bolt threads to prevent loosening from road vibration.
Torque specifications vary by hardware size and manufacturer. Most tent mounting bolts require 15-25 ft-lbs torque, while rack mounting hardware may need 35-45 ft-lbs. Follow manufacturer specifications exactly to avoid under or over-tightening.
Tightening sequences should follow a cross-pattern approach, gradually increasing torque in multiple steps. This method ensures even load distribution and prevents distortion of mounting components.
Final inspection checklist includes verifying all hardware tightness, checking tent deployment clearances, testing quick-release mechanisms (if equipped), and confirming secure attachment at all mounting points.
Quick Release Mounting Systems
Quick-release systems provide significant advantages for frequent tent installation and removal. These mechanisms enable tool-free tent mounting and dismounting, reducing installation time from hours to minutes.
Benefits of quick-release mounts include simplified tent removal for vehicle washing, improved fuel economy when tent is removed, and easier tent storage during off-seasons. Quick-release systems also facilitate tent sharing between multiple vehicles with compatible racks.
Popular quick-release brands include Front Runner with their Quick Release system, Rhino Rack with Pioneer quick-mount systems, and various universal designs compatible with multiple tent brands.
Installation time comparison shows dramatic differences between traditional and quick-release systems. Traditional bolt-on installation requires 30-60 minutes with tools, while quick-release systems typically complete mounting in 5-15 minutes without tools.
Security features in quality quick-release systems include locking mechanisms preventing theft and accidental release. Some systems incorporate keyed locks, while others use specialized tools for additional security.
Clearance and Compatibility Requirements
Proper clearance measurements prevent installation headaches and ensure safe tent operation. Insufficient clearance leads to damaged mounting hardware, difficult tent access, or impossible tent deployment.
Minimum clearance requirements mandate 3.5-4 inches between tent rails and any obstruction below. This space accommodates mounting hardware operation and allows proper tent deployment without interference.
Hand access considerations require additional clearance for operating mounting mechanisms. Your hands need space to manipulate bolts, quick-release levers, or adjustment hardware during installation and removal.
Credit card test provides a simple clearance verification method. If you can slide a credit card between tent rails and rack components with room to spare, clearance is likely adequate. Tight clearances may cause problems during actual installation.
Vehicle height considerations affect parking and daily use after tent installation. Add tent height to vehicle height to determine total clearance needed for parking garages, drive-throughs, and low overhangs.
Incompatible rack types include basket-style racks with solid flooring or integrated side rails that interfere with tent mounting hardware. These racks lack the open access needed for secure tent attachment and should be avoided for tent mounting applications.
Roof rack compatibility varies significantly between tent brands and models. Some tents work only with specific rail types or spacing requirements. Verify compatibility before purchase to avoid costly returns or additional hardware purchases.
Vehicle-Specific Installation Considerations
Different vehicle types present unique challenges and opportunities for rooftop tent installation. Understanding these considerations helps you select appropriate mounting systems and anticipate installation requirements.
Compact cars require lightweight tent options and careful weight distribution to avoid exceeding roof load limits. Many small cars limit roof loads to 100-120 lbs, restricting tent choices to hard-shell or small soft-shell models. Cross bar systems typically provide the only viable mounting option for compact vehicles.
SUV installations benefit from higher weight capacities and multiple mounting options. Most mid-size and large SUVs support roof loads of 150-200 lbs, accommodating medium to large tents with substantial gear loads. Factory roof rails simplify cross bar installation, while flat roof areas accept full rack systems.
Truck installations offer the most flexibility with both roof and bed mounting options. Roof mounting provides standard installation compatibility, while bed racks offer unique advantages for tent access and weight distribution. Consider your truck’s primary use when selecting between mounting locations.
Electric vehicle considerations include weight distribution effects on range and regenerative braking performance. EVs often have lower roof load ratings due to battery weight and center of gravity concerns. Consult manufacturer specifications before installing heavy tent systems.
Jeep Wrangler specific tips address common installation challenges including removable doors, fold-down windshield, and factory soft tops. Hard top installations provide secure mounting points, while soft top vehicles may require specialized hardware or temporary hard top installation.
Vehicle height restrictions may limit tent size options or require low-profile mounting systems. Measure total vehicle height with tent installed to verify clearance for regular parking and travel routes.
Installation Tips and Best Practices
Professional installation techniques ensure safe, secure tent mounting while avoiding common pitfalls that plague DIY installations. These proven strategies help you accomplish professional-quality results with standard tools and careful planning.
Using helpers or mechanical aids becomes essential for tent installation on tall vehicles. Rooftop tents weigh 125-200 lbs and require careful handling to prevent damage or injury during mounting. Recruit at least one helper for safe tent lifting and positioning.
Furniture dollies and ramp systems provide mechanical advantage for tent installation without requiring multiple helpers. Position a dolly beside your vehicle and use it as a staging platform for tent positioning. Some installers build temporary ramps allowing tent placement from ground level.
Winch systems offer the ultimate solution for single-person tent installation on tall vehicles. Portable winches or pulley systems enable safe tent lifting and positioning without requiring additional manpower. This approach works particularly well for frequent tent removal and installation.
Marking crossbar positions before final installation prevents measurement errors and ensures optimal tent placement. Use masking tape to mark exact positions, then double-check measurements before drilling holes or tightening hardware.
Breaking in new mounting hardware gradually prevents sudden failures during travel. Start with short trips and light loads, checking hardware tightness after 25, 50, and 100 miles of driving. Many manufacturers recommend retorquing all hardware after initial break-in periods.
Pre-installation planning reduces installation time and prevents compatibility surprises. Lay out all components, read instructions completely, and verify tool requirements before beginning work. Identify any missing hardware or compatibility issues before starting installation.
Weather conditions significantly affect installation success and safety. Avoid installations during high winds, rain, or extreme temperatures. Optimal conditions include calm winds, dry surfaces, and moderate temperatures for safe working conditions.
Troubleshooting Common Installation Issues
Even well-planned installations encounter unexpected challenges requiring creative solutions. Understanding common problems and their solutions helps you navigate installation difficulties and complete successful mounting projects.
Tent doesn’t fit on marked crossbar positions despite careful measurements often results from rack system tolerances or tent rail variations. Solution involves slightly adjusting crossbar positions within manufacturer specifications or using adapter plates to modify mounting geometry.
Insufficient clearance for mounting hardware occurs when rack systems don’t provide adequate space below tent rails. This problem requires different mounting hardware, rack system modification, or spacer installation to create necessary clearance.
Vibration and rattling problems during driving typically result from loose hardware, inadequate dampening, or resonance between tent and vehicle. Solutions include retightening all hardware, installing rubber isolation pads, or adjusting tent position to eliminate resonance frequencies.
Incompatibility between tent rails and mounting hardware requires adapter solutions or hardware substitution. Many tent manufacturers offer multiple mounting hardware options for different rack systems. Contact manufacturers for compatibility guidance when standard hardware doesn’t fit properly.
When to contact manufacturers includes situations involving safety-critical compatibility questions, missing hardware, or unusual vehicle configurations. Most tent and rack manufacturers provide technical support for installation questions and can suggest solutions for challenging installations.
Communication with customer support improves when you provide specific vehicle information, rack system details, and tent model numbers. Take photos of problem areas to help support staff understand your specific situation and suggest appropriate solutions.
Professional Installation vs DIY
When to consider professional installation includes complex permanent rack systems, vehicles requiring drilling or modification, or situations where warranty coverage requires professional work. Professional installation typically costs $200-500 but includes labor warranties and proper insurance coverage.
Cost comparison between professional and DIY installation reveals significant savings for DIY approaches on simple cross bar systems. Complex installations may justify professional costs through time savings and warranty benefits.
DIY installation skill requirements include basic mechanical ability, tool familiarity, and comfort working at vehicle height. Most cross bar installations require only basic hand tools and moderate mechanical skills.
Time commitment for DIY installation ranges from 2-4 hours for simple cross bar systems to 6-8 hours for complex rack installations. Factor learning curves and problem-solving time into your installation planning.
Available installation support from manufacturers includes technical hotlines, installation videos, and detailed instruction manuals. Many companies provide YouTube videos demonstrating installation procedures for specific vehicle and tent combinations.
Local dealer networks often provide installation services for customers purchasing complete systems. This approach combines professional installation with manufacturer warranty coverage and ongoing support relationships.
Maintenance and Long-Term Care
Proper maintenance extends mounting system life while ensuring continued safety and performance throughout years of adventure use. Regular inspection and care prevent small problems from becoming dangerous failures.
Regular inspection schedule should include monthly visual checks and detailed inspections before major trips. Look for loose hardware, corrosion, wear patterns, or damage that could affect system integrity.
Monthly inspections focus on hardware tightness, especially after rough driving or extreme weather exposure. Check all mounting bolts, rack attachments, and tent hardware for proper torque. Address any looseness immediately to prevent progressive failure.
Retorquing requirements vary by hardware type and exposure conditions. Most manufacturers recommend checking torque every 1000 miles during initial break-in periods, then quarterly thereafter. Keep a maintenance log tracking inspection dates and findings.
Cleaning and protecting mounting components prevents corrosion and extends service life. Use mild soap and water for routine cleaning, avoiding harsh chemicals that might damage finishes or seals. Apply protective treatments to exposed metal surfaces in corrosive environments.
Seasonal removal and storage considerations apply to removable mounting systems or occasional users. Store components in dry locations protected from temperature extremes and UV exposure. Inspect stored components before reinstallation each season.
Signs of wear requiring hardware replacement include visible corrosion, bent components, stripped threads, or excessive play in mounting points. Replace worn components immediately to prevent system failure during travel.
Annual professional inspections provide expert evaluation of system condition and identify potential problems before they become dangerous. Many rack manufacturers offer annual inspection services at reasonable cost.
Lubrication requirements for moving components include quick-release mechanisms, adjustment hardware, and pivot points. Use manufacturer-recommended lubricants and follow suggested service intervals to maintain smooth operation.
Documentation of maintenance activities helps track component life and identify patterns requiring attention. Keep records of inspection dates, hardware replacement, and any problems encountered for future reference.
Proper roof top tent mounting combines careful planning, quality components, and meticulous installation techniques to create safe, reliable camping platforms. Whether you choose cross bars for budget-friendly weekend trips or full rack systems for serious overlanding, success depends on understanding weight limits, ensuring proper clearances, and following manufacturer specifications exactly.
The investment in proper mounting hardware pays dividends through years of reliable service and safe adventures. Take time to research compatibility, measure carefully, and don’t hesitate to seek professional help when installations exceed your comfort level. Your safety and enjoyment depend on getting the mounting system right from the start.
Remember that roof top tent mounting is not a one-time project but an ongoing maintenance commitment. Regular inspections, proper care, and timely hardware replacement ensure your investment continues providing reliable service throughout countless adventures ahead.